Ever wonder how much you spent on Amazon through the years and feel like it’s a puzzle you can’t solve? Knowing where your money goes is vital to keep your budget healthy, and let’s be honest, those quick-click purchases can add up fast. I’m here to grab your hand and lead you through the simple yet secretive forest of Amazon’s spending history. Fasten your seatbelt; we’re about to dive into numbers!
Viewing how much cash has flowed from your wallet to Amazon isn’t as difficult as it may seem. If you want an eye-opening peek at your spending habits, everything is neatly tucked away in your account settings. Just head over to “Your Orders,” sift through past purchases, and there it is—every dime spent displayed like breadcrumbs left on a trail.
Bold Points You’ll Get From This Quick Guide
- Decode secret spending patterns with simple steps
- Witness the unseen total of all your purchases
- Turn detective with Chrome extensions – uncover hidden totals
- A no-sweat crash course in handling Amazon finances
Understanding Spent On Amazon’s Financial Interactions
Shopping on Amazon can be like walking through a store with endless aisles. There’s something about clicking “Add to Cart” that feels so easy, it’s like the money isn’t even real! But it is, and keeping an eye on how much cash you’re spending is vital.

Why? Pretty simple: You need to make sure you’re not going over your budget.
The Importance of Tracking Your Spending
So, why should you care about how much you spend on Amazon? Well, when you track where your money goes, you can see if you’re buying stuff you don’t need. It also helps prevent those big shocker moments when you check your bank account and think, “Where did all my money go?” Plus, being aware of your spending habits can help keep your finances in shape – just like knowing what foods to eat keeps your body healthy.
Navigating Through Your Purchase History
Now let’s talk about how to look at what you’ve bought. Sign into Amazon and find where it says “Returns & Orders.” This is like a treasure map that shows all the things you’ve bought in the past.
Checking this list out is handy for sure if making returns or reordering favorites – but also spot-on for seeing how much dough has been dished out over time. Each item shows its price, so by looking at each one (or using a calculator), adding them up can give an idea of the total amount spent.
Also Read: Cat and Jack Return Policy Explained: Easy Guide at Target
Navigating Through Your Purchase History
When I want to take a peek at what I’ve bought on Amazon, it’s pretty simple. There’s a spot where all my orders hang out together, like friends at a party. This is my purchase history. It shows me everything from that cool book I bought last week to the birthday gift I sent my sister last year.

All of this info lives in the “Your Orders” section on Amazon. To get there, the first thing you do is log into your account. Then, you look for the little area that says “Returns & Orders” right up at the top of the page. A simple click and bam! You’re in.
One cool thing is that Amazon doesn’t just show you recent stuff; it lets you travel back in time through your orders from months or even years ago. It’s like having a time machine for shopping!
Ways to See How Much You Spent On Amazon
But then again, sometimes I need to know exactly how much cash I’ve waved goodbye to on Amazon – like when I’m trying to make a budget or just getting curious about where my money goes.
Now guess what? There are ways to figure this out without having to grab a calculator and go through every single purchase one by one (whew!). Let me tell you about them.
Through All Transactions
The old-school way? Go into “Your Orders,” then put on your detective hat and start clicking through each order one after another. As you go through them, write down how much each thing costs and add it all up at the end.
Sure, it takes some patience and maybe more math than some folks are comfortable with, but hey – it’ll give you that total of what’s been spent!
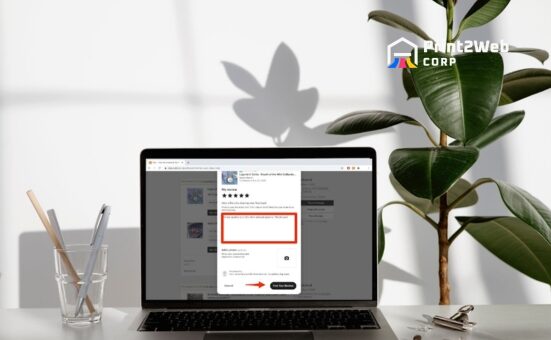
Using a Chrome Extension
And here comes modern technology to save the day! Have Google Chrome as your internet sidekick? Awesome! There are these nifty tools called Chrome extensions designed especially for figuring out how much dough we’ve plunked down on Amazon.
One such tool is “Amazon Spend” – kind of like picking an electronic helper who’s super good at math. You download this helper onto Chrome from their web store and let it hook up with your Amazon account (don’t worry – it’s safe). Then watch as it does all that heavy number-crunching for ya’!
What’s magic about these tools is they work right within your browser while keeping things super easy: a few clicks here and there and suddenly – ta-da! – there’s your spending amount staring back at ya’. It almost feels like cheating… but in a good way!
Through All Transactions Spent On Amazon
When I want to find out how much money I spent on Amazon, looking at every single thing I bought can be helpful. This means going through every order one by one to see each price. It might take time, but it shows me exactly where my money went.

Using a Chrome Extension
A Google Chrome extension can make this task easier. Here’s how to do it:
- Open Google Chrome: Before anything else, I need to start up my web browser, which is Google Chrome.
- Find the Extension: In the top-right corner of my browser, there’s a little puzzle piece icon for extensions. Clicking this gives me access to the ‘Chrome Web Store’. Here, I type in “Amazon Spend Tracker” or something similar in the search bar.
- Install the Extension: When I see a good extension that tracks spending on Amazon, I click ‘Add to Chrome’. This adds it right onto my browser.
- Set It Up: Sometimes these extensions ask for login details or permissions before they start working.
- Visit Amazon.com: With the extension installed and set up, I go over to Amazon’s website and sign into my account if not already done so.
- Run the Extension: By clicking on the new icon that appeared near my other extensions or using any button provided within Amazon’s page itself, I activate it.
- Review Your Spending: The tool starts calculating how much money was spent by scanning through all of my past Amazon purchases.
Once done, this smart tool hands over a total amount telling me just how much cash has flowed from my pocket into Amazon’s hands since starting shopping there.
It’s easy and keeps things clear for those not fond of math or who save time topping their list!
Also Read: Unlock Profit Potential: Vending Machine Business Strategies
Delving Into An Order List View
When I want to see exactly how much I’ve spent on Amazon, I need to take a good look at all the things I have ordered. There’s a special way to do this on Amazon’s website. It’s called looking at your order list view. Think of it like flipping through the pages of a diary that shows you everything you’ve bought.

Overview Of Your Past Orders
The order list view is a big list of everything you’ve ever bought on Amazon. It shows me each item separately along with the date I bought it and how much it cost. When I look at this list, it helps me understand where my money is going.
For instance, if I see that last month, there were lots of little things I ordered which added up to a lot, it tells me maybe next time, instead of buying many small items, I should think more about each purchase.
It’s pretty easy to find this in your account on Amazon:
- First, log into your Amazon account.
- Then click where it says “Returns & Orders” at the top right corner.
- Now, you can see all your past orders.
Each item will have its spot in this list with all the important info: what was bought, how much was paid for it (that includes taxes and shipping fees), and when was it ordered.
This helps me keep an eye on my spending because when things are listed out like that and easy for me to read one by one, no expense slips through unnoticed.
Also Read Target Circle Secrets – Unlock Hidden Shopping Perks Now!
Frequently Asked Questions
Do you need insurance for your drone business?
Yes, it’s a smart choice to have insurance for your drone business to protect against potential accidents or damages.
When don’t you need drone coverage?
You might not need drone coverage if you’re flying as a hobbyist and not for commercial purposes but check local regulations.
What is personal drone insurance?
Personal drone insurance provides coverage for non-commercial pilots, protecting against damage or injury claims from third-party individuals.
What is commercial drone insurance?
Commercial drone insurance protects businesses using drones from liability and damage costs related to their commercial operations.
Also Read: Private-Label Credit Card Secrets: Unlock Shopping Benefits!
Conclusion
After going through these steps, I’ve got a better handle on my purchases. Knowing how much I spend on Amazon helps me stay in control of my finances and make smarter buying decisions. It may seem a bit of a chore at first, but once you get into the habit, it’s worth it. By checking past transactions or using handy tools like Chrome extensions, anyone can do this easily.
Remember that responsible spending leads to better financial health, so take advantage of these simple methods to keep track of your expenses.